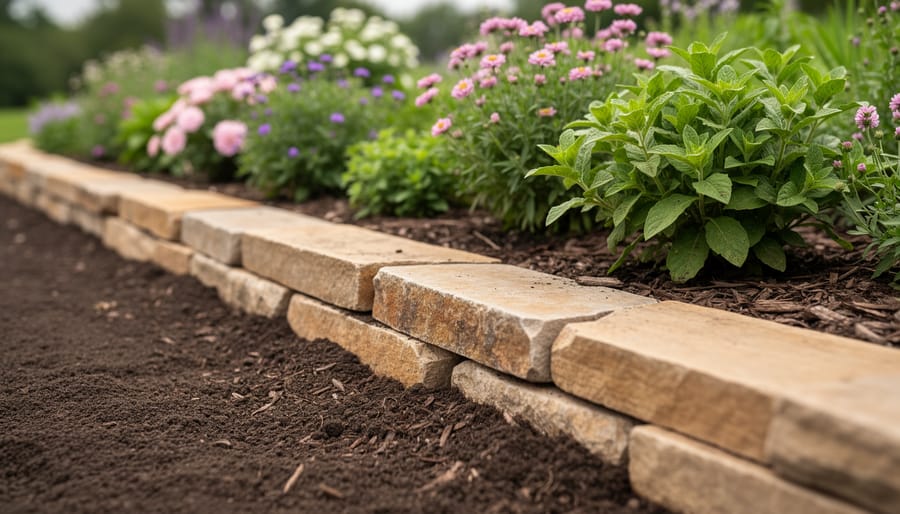
You can create professional-looking garden edging for under $50 using repurposed materials, natural stone, or simple lumber techniques that take just a few hours to install. Whether you’re establishing flower beds for a floristry course project or building a sustainable cut flower garden for your business, economical edging delivers clean borders, weed suppression, and structural definition without the premium price tag of commercial systems.
The best budget-friendly edging options reduce landscape maintenance costs by 40 to 60 percent compared to professional installations while lasting five to ten years with minimal upkeep. Canadian growers working with seasonal freeze-thaw cycles need solutions that withstand soil movement, and the right economical materials, from recycled bricks to cedar boards, offer that durability.
Most florists and flower growers underestimate how much professional appearance matters when clients visit growing spaces or when documenting portfolio work. Defined garden beds signal attention to detail and business credibility. But commercial edging kits often run $15 to $25 per linear foot, pricing out new businesses or home growers expanding their operations.
The techniques outlined here work equally well for perennial cutting gardens, annual display beds, and pathway borders. You’ll need common hand tools, a willingness to work methodically, and about three to four hours per 50 linear feet of edging. The investment pays back immediately through reduced mulch migration, cleaner mowing lines, and the polished presentation that helps aspiring florists build their professional reputation from the ground up.
Materials and Tools You’ll Need
Free and Salvaged Materials
The most budget-friendly edging starts with materials you already have. Walk your property to collect natural stones, which create attractive, permanent borders that handle Canadian freeze-thaw cycles well. Aim for stones roughly the same size to maintain a consistent look along your flower bed.
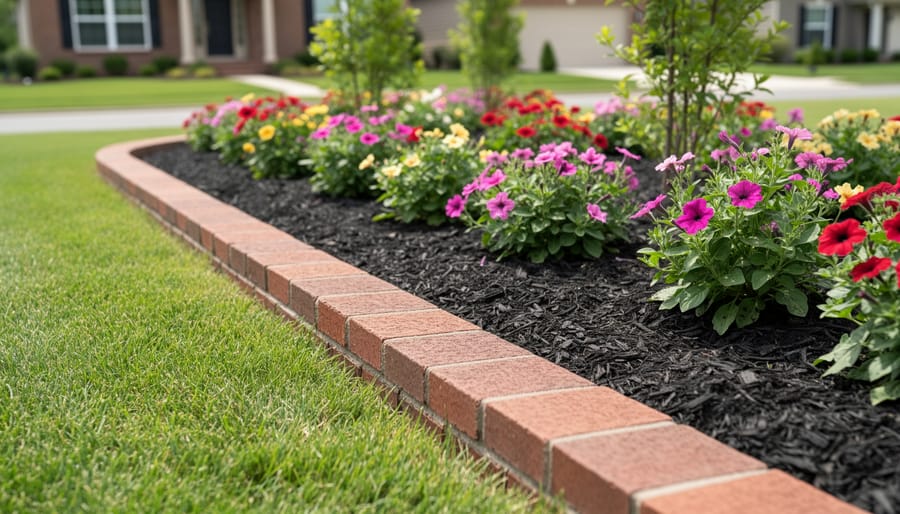
Reclaimed bricks offer another excellent free option. Check demolition sites, renovation projects in your neighborhood, or online community groups where people give away leftover materials. Even chipped or weathered bricks work perfectly for garden edging and develop character over time.
Fallen branches from pruning or storm cleanup make rustic borders that suit cottage-style gardens. Choose branches 2-4 inches in diameter and cut them into 12-18 inch lengths. These wooden sections decompose slowly while adding organic matter to your soil.
Don’t overlook household items destined for recycling. Wine bottles buried neck-down create colorful borders, while old roof tiles, terracotta pot pieces, or salvaged pavers all function as effective edging materials that cost nothing but your collection effort.
Budget-Friendly Purchased Options
When salvaged materials aren’t available, several commercial edging products deliver professional results without straining your budget. Plastic roll edging remains the most economical purchased option in 2026, typically costing $12, $18 for a 20-foot roll at Canadian garden centers. These flexible strips work well for curved beds and install quickly with included stakes. Look for UV-resistant varieties that won’t become brittle after one season.
Rubber borders made from recycled tires offer surprising durability at $15, $25 per 10-foot section. They flex around curves naturally and withstand Canadian freeze-thaw cycles better than rigid materials. The recycled content appeals to environmentally conscious flower growers.
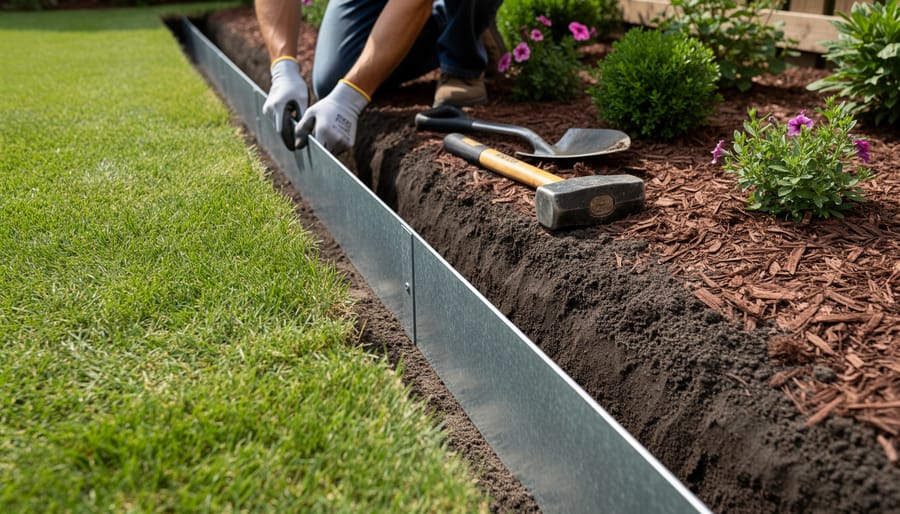
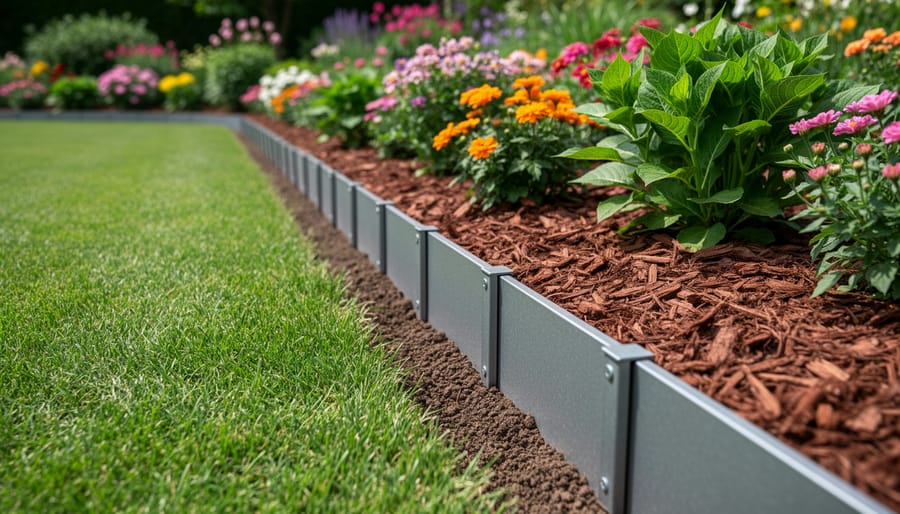
Basic galvanized metal edging strips ($20, $30 for 16 feet) create clean, modern lines that last years. While pricier upfront, metal edging requires minimal replacement, making it cost-effective long-term for straight borders around formal cutting gardens.
Shop end-of-season sales at Canadian hardware chains for significant discounts. Many stores clear garden supplies at 40-60% off in late September, letting you stock materials for next spring’s installations at exceptional prices.
Safety Considerations and Planning
Before you start digging, take time to protect yourself, your garden, and your property. Working at ground level and excavating soil carries real risks that you can easily avoid with a few sensible precautions.
Beyond utilities, think about what lies beneath your flower beds. Plant roots extend well beyond the visible foliage, and careless digging can damage the very flowers you’re trying to protect. Before you mark your edging line, check where established perennials have their root zones and plan to work outside those areas. If you’re edging around shrubs or trees, stay at least 30 centimeters from the trunk to avoid severing major roots.
Tool safety matters too. Keep spades and edgers sharp, dull blades require more force and increase your risk of slipping or straining muscles. When you’re working bent over or kneeling for extended periods, take regular breaks to stand and stretch. Your back and knees will thank you, especially on larger projects that span multiple days.
For planning, measure your flower bed perimeter with a measuring tape or length of rope to calculate how much material you’ll need. Add 10 percent extra to account for curves, overlaps, and any mistakes. Decide on your edging depth based on your material and purpose: shallow edging (5-8 centimeters) works for visual definition, while deeper installation (10-15 centimeters) provides better barriers against spreading grass roots. Mark your intended line with stakes and string or a light spray of landscaping paint so you maintain consistent spacing as you work.
Step-by-Step Installation Process
Preparing the Border Line
Start by placing a garden hose or rope along the ground to visualize your flower bed’s shape. Step back and adjust the curve until it looks natural and flows well with your garden’s layout. For straight edges, stretch a string line between two stakes, pulling it taut to ensure precision.
Once satisfied with the placement, mark the line using spray paint designed for landscaping or flour sprinkled from a bottle. These markers stay visible while you work but won’t harm the soil.
Next, use a sharp spade or half-moon edger to cut along your marked line. Insert the blade vertically to its full depth, creating a clean slice through the grass and soil. Work in short, overlapping cuts for the cleanest results.
Remove a trench approximately 4-6 inches wide and 3-4 inches deep for most economical edging materials. Adjust this depth based on your chosen edging: bricks need 2-3 inches below ground, while plastic roll edging requires a full 4-inch depth for stability. Lift out the sod in manageable chunks, shaking off excess soil to reuse elsewhere in your garden or compost it.
Installing Different Edging Materials
Stone and brick borders require stable foundations to prevent shifting. Place each stone or brick flat-side down in your prepared trench, butting edges tightly together. For a professional look, use a level to check alignment every few pieces and tap high spots gently with a rubber mallet. Pack soil firmly behind and beneath each unit as you work down the line. If using irregularly shaped stones, position larger pieces at corners and gates where stability matters most, then fill between with smaller stones that fit the gaps naturally.
Plastic or metal edging strips install quickly with minimal tools. Unroll the material along your trench, keeping the top edge at consistent height, typically one inch above soil level to block grass runners while allowing mower wheels to pass. Drive the anchoring stakes through pre-formed holes every 18 to 24 inches, angling them slightly toward the bed for extra holding power. On curves, work slowly and use additional stakes to prevent buckling. Metal strips may need tin snips for custom lengths.
Wood borders from salvaged lumber or untreated cedar boards create clean lines economically. Stand boards on edge in the trench, bracing them with stakes pounded into the soil every three feet. Attach boards to stakes with galvanized screws rather than nails, they hold better through seasonal ground movement. Butt board ends tightly or overlap them at corners for structural strength.
Natural material edging using branches, logs, or bamboo stakes provides rustic definition. Pin larger branches horizontally using rebar stakes or landscape staples. For upright stick borders, push individual pieces six inches deep and space them two to three inches apart for a woven appearance that contains mulch effectively while allowing water through.
Securing and Finishing
Once your edging material is positioned, proper finishing ensures it stays put through seasons and weather. Start by backfilling the gap between your edging and the flower bed with the soil you removed earlier. Pack this soil firmly against the edging’s inner edge using your hands or the back of a trowel, loose soil creates air pockets that let materials shift.
Tamp the soil on both sides of the edging with your foot or a hand tamper. Walk along the entire border, applying even pressure to compress the earth. This anchors the bottom portion and prevents tilting. For stone or brick edging, check that each piece sits level with its neighbours; tap down any high spots with a rubber mallet.
Secure loose materials with additional stakes if needed. Plastic and metal edging often requires stakes every 90-120 cm to prevent bowing. Natural wood borders benefit from landscape spikes driven through at joints.
Rake away excess soil and debris from the edging surface and surrounding lawn. A clean border line looks intentional and professional. Water the backfilled soil lightly to help it settle, you’ll likely need to top up with more soil within a week as settling occurs.
Testing Your Edging and Troubleshooting
After your edging installation is complete, take time to verify everything functions as intended before moving on to planting or mulching. Start by walking the entire perimeter and gently pushing against the edging at several points. Properly installed borders should resist this pressure without shifting or tilting. If you notice movement, add more backfill soil and tamp it firmly, or drive additional stakes for plastic or metal edging.
Test drainage by pouring a bucket of water near the edging line and observing how it flows. Water should move away from the flower bed or drain through the edging without pooling against it, which could rot plant roots or destabilize the border. If you see standing water, you may need to adjust the edging height or create small drainage gaps.
Run through these quick verification points to catch issues early:
- Press firmly on edging every meter to check for loose sections needing additional securing
- Verify the top edge sits level with or slightly below lawn height for easy mowing
- Look for gaps between edging pieces where mulch or soil could escape
- Check that edging doesn’t lean inward, which crowds plants and looks unprofessional
- Confirm no sharp edges or protruding stakes pose safety hazards
Common problems have straightforward solutions. Shifting stones or bricks usually need deeper trenches or a sand base for stability. Gaps between plastic edging sections often result from insufficient overlap during installation, address them by removing stakes, adjusting pieces to overlap properly, and re-securing. If wooden edging shows immediate warping, you likely need thicker boards or more frequent stakes. For metal edging that won’t stay anchored in loose soil, try longer stakes or pre-water the ground before hammering them in. These adjustments take minutes now but prevent frustrating repairs later when plants have established roots around your borders.
Long-Term Maintenance and Cost Management
Seasonal Upkeep Tips
Canadian gardens face unique challenges as temperatures swing from harsh winters to warm summers. In spring, inspect your edging after snowmelt, freeze-thaw cycles often heave stones and shift plastic strips. Reset any displaced materials while the soil is workable, pressing them firmly back into position before your budget-friendly plants begin active growth.
Before winter arrives, clear fallen leaves and debris from edging gaps where moisture can collect and freeze, potentially cracking materials. For wood borders, apply an annual coat of exterior sealant in late fall to prevent rot damage during wet months. Metal edging may benefit from rust-preventive treatment every two years. Summer maintenance is minimal, simply check that borders remain level after heavy rains and trim encroaching grass before it roots under the edging.
When to Repair or Replace
Garden edging typically signals repair needs through visible shifts, gaps wider than two inches, or materials that wobble when pressed. Check edging after spring thaw in Canada, as freeze-thaw cycles often displace stones or push up plastic strips. Small separations under three inches usually need simple repositioning rather than replacement, press materials back into place and add soil to fill gaps.
Replace sections only when materials crack beyond repair, wood shows extensive rot, or metal develops sharp rust edges that pose safety risks. Even then, replace just the damaged portions instead of entire borders. Salvaged bricks with minor chips remain functional for years, and plastic edging with small cracks can serve another season if secured properly with additional stakes. This selective approach cuts maintenance costs significantly while keeping flower beds defined and professional-looking for your floristry work.
Next Steps: Enhancing Your Flower Garden Affordably
With your edging installed, you’ve created defined spaces that make the rest of your garden work easier and more productive. Those bordered beds naturally guide your next steps: planning what grows inside them. Consider companion planting within your newly defined areas, pairing flowers that support each other’s growth while deterring pests reduces the need for costly interventions. Your edging also helps you designate specific zones: one bed for quick annuals that fill gaps in bouquets, another for perennials that return year after year without replanting costs.
For those building floristry skills or starting small flower businesses, professional presentation matters. Well-edged beds photograph beautifully for portfolios and demonstrate attention to detail that clients notice. The investment you’ve made in economical edging pays forward when your organized growing spaces yield consistent, quality blooms that deliver professional results.
Which economical edging material lasts longest in Canadian climates?
Stone and brick handle freeze-thaw cycles best, often lasting decades with minimal maintenance. Metal edging also performs well if properly secured against frost heave.
Can I mix different edging materials in the same garden?
Yes, mixing materials works well, use more durable options like stone for high-visibility front beds and simpler plastic edging for utility areas. Consistent installation depth helps different materials look intentional together.
How does edging improve flower production for cutting?
Defined borders prevent lawn grass from stealing nutrients and water from your flowers. They also make it easier to access plants for harvesting without compacting soil around stems.
Tadine offers mentorship connections for aspiring florists who want guidance on growing quality flowers economically. Learning from experienced growers helps you avoid costly trial-and-error while building the practical skills that turn bordered beds into productive flower sources for arrangements and events.